Bootstrap Row Set
Introduction
Just what do responsive frameworks complete-- they deliver us with a handy and working grid environment to put out the material, ensuring that if we specify it correctly so it will do the job and showcase effectively on any sort of device despite the sizes of its display. And just like in the construction every framework featuring some of the most preferred one in its latest version-- the Bootstrap 4 framework-- include simply a few basic elements which set and integrated efficiently have the ability to help you develop nearly any kind of appealing appeal to suit your design and view.
In Bootstrap, typically, the grid setup gets created by three basic elements which you have quite possibly previously encountered around reviewing the code of some web pages-- these are the
.container.container-fluid.row.col-Assuming that you're fairly new to this whole entire thing and at times get to ask yourself which was the right manner these 3 needs to be positioned within your markup here is a practical tip-- everything you require to always remember is CRC-- this abbreviation comes with regards to Container-- Row-- Column. And given that you'll quickly adjust noticing the columns serving as the inner component it is certainly not change probable you would certainly misstep what the primary and the last C stands for. ( additional reading)
Number of words regarding the grid system in Bootstrap 4:
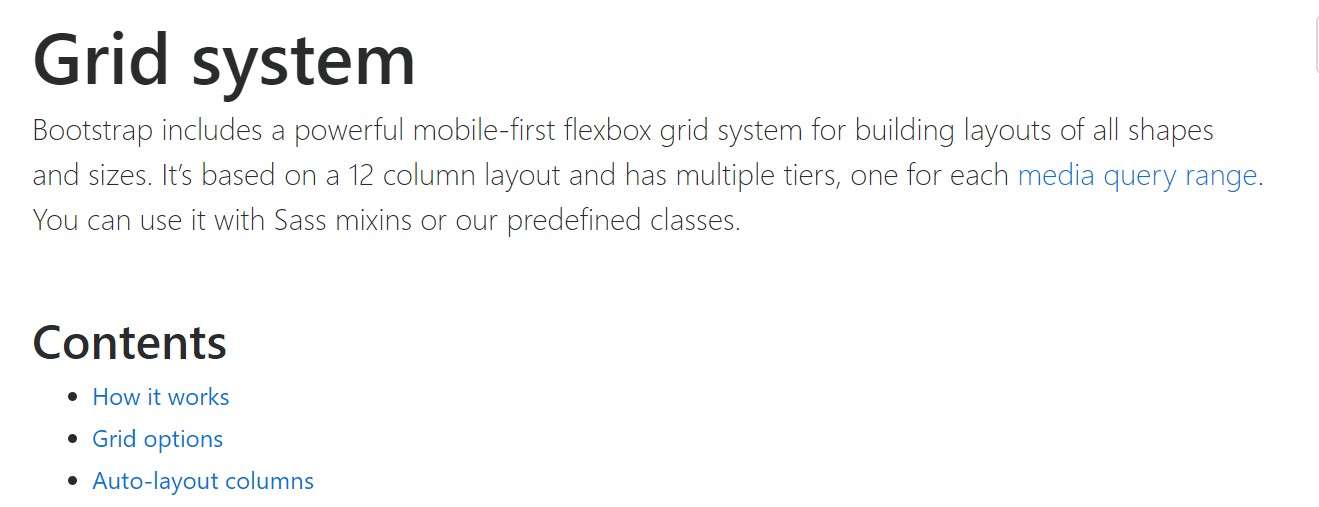
Bootstrap's grid system utilizes a series of containers, columns, and rows to layout and adjust material. It's built through flexbox and is completely responsive. Shown below is an example and an in-depth explore just how the grid comes together.

The above situation builds three equal-width columns on small-sized, medium, big, and also extra large size gadgets working with our predefined grid classes. All those columns are focused in the web page with the parent
.containerHere is simply in what way it operates:
- Containers deliver a solution to center your site's elements. Apply
.container.container-fluid- Rows are horizontal bunches of columns which make sure your columns are certainly lined up correctly. We apply the negative margin method for
.row- Content has to be set within columns, and just columns may possibly be immediate children of Bootstrap Row Set.
- With the help of flexbox, grid columns with no a established width is going to promptly format using equivalent widths. As an example, four instances of
.col-sm- Column classes reveal the number of columns you want to employ from the possible 12 per row. { In this way, in the case that you want three equal-width columns, you have the ability to apply
.col-sm-4- Column
widths- Columns have horizontal
paddingmarginpadding.no-gutters.row- There are 5 grid tiers, one for each responsive breakpoint: all breakpoints (extra little), little, medium, large, and extra large size.
- Grid tiers are built on minimum widths, implying they put on that one tier and all those above it (e.g.,
.col-sm-4- You may employ predefined grid classes or Sass mixins for extra semantic markup.
Be aware of the limitations together with problems around flexbox, such as the lack of ability to work with several HTML elements as flex containers.
While the Containers grant us fixed in max width or else dispersing from edge to edge straight area on screen with slight convenient paddings across and the columns grant the means to delivering the screen area horizontally-- once again with several paddings about the certain material providing it a space to take a breath we are simply going to point our focus to the Bootstrap Row feature and all the great methods we are able to employ it for designating, aligning and delivering its components working with the bright brand new to alpha 6 flexbox utilities that are truly a number of classes to bring in to the
.row-sm--md-How you can work with the Bootstrap Row Css:
Flexbox utilities may be utilized for developing the disposition of the components put in a
.row.flex-row.flex-row-reverse.flex-column.flex-column-reverseHere is precisely how the grid tiers infixes get used-- for instance to stack the
.row.flex-lg-column.flex-With the flexbox utilities placeded on a
.row.justify-content-start.justify-content-end.justify-content-center.justify-content between.justify-content-aroundThis counts also to the vertical setting which in Bootstrap 4 flexbox utilities has been simply dealt with just as
.align-.align-items-start.row.align-items-end.align-items-centerAn additional selections are aligning the items by their baselines being straightened the class is
.align-items-baseline.align-items-stretchEach of the flexbox utilities specified already assist independent grid tiers infixes-- insert them right prior to the last word of the corresponding classes-- just like
.align-items-sm-stretch.justify-content-md-betweenConclusions
Here is actually precisely how this essential however at very first look not so customizable element-- the
.rowReview a few video tutorials regarding Bootstrap Row:
Linked topics:
Bootstrap 4 Grid system: main documentation
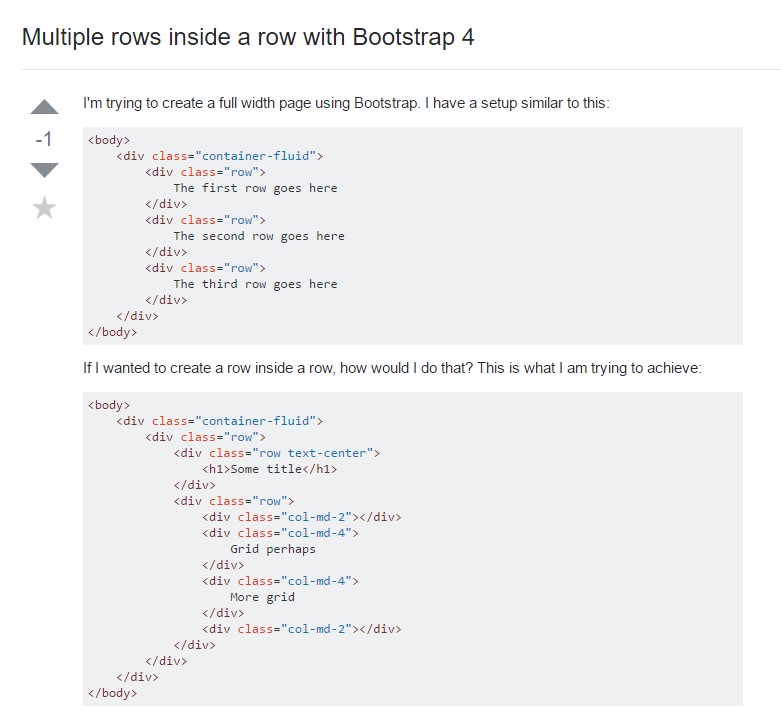
Multiple rows inside a row with Bootstrap 4
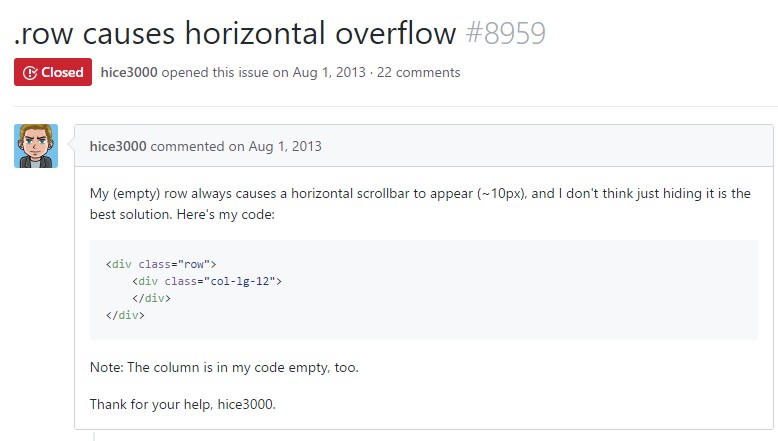
Another trouble: .row
causes horizontal overflow
.row